MSI Deployment with Intune as Win32 App
- Florian Salzmann
- Posted on 29 Apr, 2024
- Updated on 02 May, 2024
- 02 Mins read
- Microsoft Intune,Win32 Applications
Managing Win32 applications within your organization can be a challenge. Thankfully, Microsoft Intune offers a robust solution for deploying these applications to your Windows devices. Depending on your application the process is simple or not ;)
In this blog I want to show you how to handle simple MSI packages without any additional files like MST’s or Program files.
Prerequisites for Win32 Deployment with Intune
Before deploying Win32 applications with Intune, ensure you meet these requirements:
- Windows 10 version 1607 or later (Enterprise, Pro, Education): Intune only supports these specific Windows versions.
- Device enrollment: Devices must be enrolled in Intune (Hybrid or Entra ID joined).
- Application size: The maximum file size for a Win32 application is 30GB (previously 8GB).
- Microsoft Win32 Content Prep Tool: Download it, the tool doesn’t need installation and can be run without admin privileges.
Preparing the Win32 Applications (intunewin)
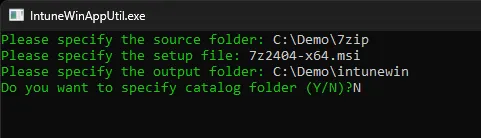
The Microsoft Win32 Content Prep Tool provides a streamlined process for deploying Win32 applications. Here’s how:
- Place your MSI in an empty folder
- Open the Microsoft Win32 Content Prep Tool and type in the location of your MSI.
- Enter the name of your MSI file
- Enter a folder where the output should be stored (I recommend not no use the source path)
- Hit Enter and wait until the windows is closing
- Now your intunewin file is ready.
Upload the Win32 App to Intune
Add the application to Intune: Upload the packaged application to Intune.
- Login to Intune
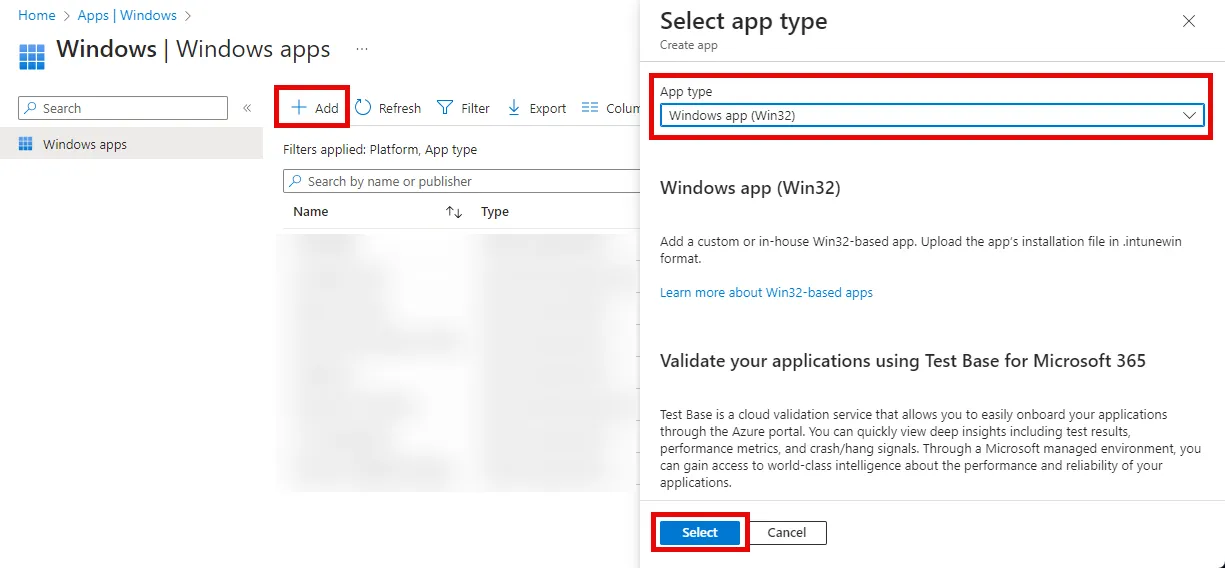
- Navigate to: Apps > Windows
- Click +Add
- Choose: Windows app (Win32)
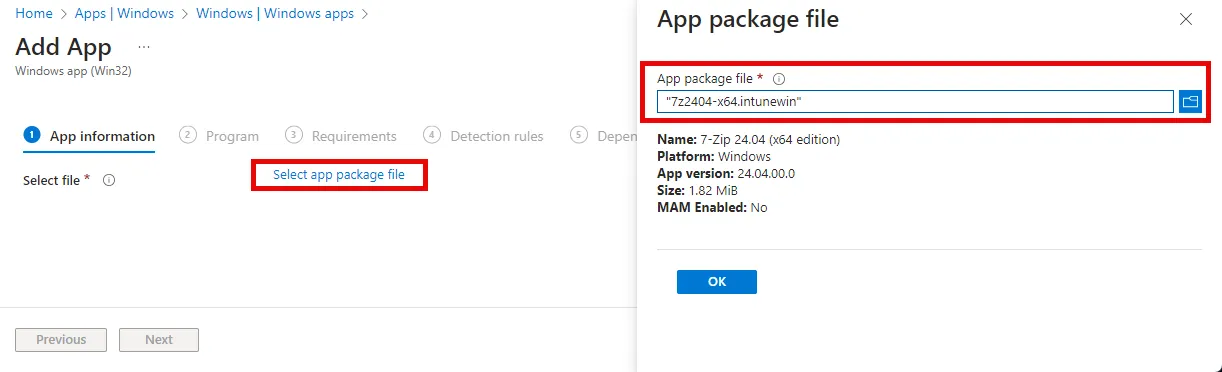
- Upload the YourAppName.intunewin
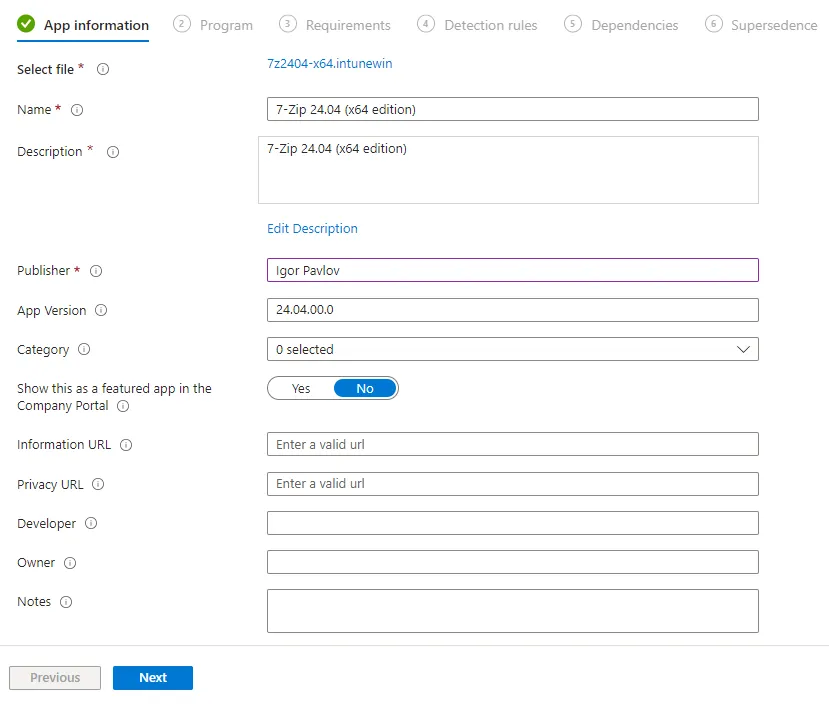
- Most of the App information will be prepopulated because they are already present in the MSI. Just add the information you want in addition or change what’s already there.
- The Install and Uninstall command will be auto populated, because you have chosen the MSI as the installer. However, you can add additional parameters according to your needs.
- What I like to add as well is a log path. As the location I choose the Intune Log on the device.:
/l*v “C:\ProgramData\Microsoft\IntuneManagementExtension\Logs\YourAppName.log”
- What I like to add as well is a log path. As the location I choose the Intune Log on the device.:
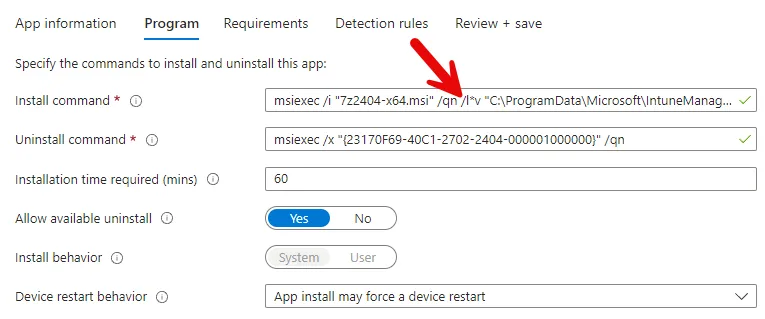
- Install behavior: Most times System
- In the Requirements choose:
Operating system architecture: 64-bit
Minimum OS: what suites you, if you don’t have special requirements choose 2004 - In the Detection rules choose “Manually configure detection rules” and set it to this MSI:
- Cause you defined the MSI as the installer, its code will automatically be added for you.

- You can skip the next three steps Dependencies, Supersedence and Scope tags
- In the Assignments add your desired groups and your good to go.
Demo Video
Advanced Scenarios
If you have more advanced scenarios I suggest to use the PSAppDeployToolkit which has a lot of great packaging features. For an overview, check out this webinar from PatchMyPC: PSAppDeployToolkit 101 Webinar - Patch My PC
For more infos and ideas about win32 applications also check out my other post about win32 apps: Blogs about Win32 Applications | scloud