Set DNS Suffixes via Microsoft Intune
- Florian Salzmann
- Posted on 13 May, 2026
- 02 Mins read
- Microsoft Intune,Windows 10,Windows 11
DNS suffixes via Microsoft Intune help users access internal resources without typing full domain names. That makes things like file shares and internal websites easier to reach.
For example, users can type fileserver instead of fileserver.ad.scloud.es.
(ad.scloud.es = your local Active Directory domain name)
In this guide, I create a Settings Catalog profile, configure the suffixes, and verify the result on a Windows device.
How DNS suffix search lists work
Windows uses the DNS suffix search list when resolving short, unqualified hostnames.
For example, a user might enter this path:
\\fileserver\shareWindows can append a configured suffix and query this fully qualified domain name:
fileserver.ad.scloud.esYou can add multiple DNS suffixes. Windows processes them in the configured order.
Create the Settings Catalog profile
First, sign in to the Microsoft Intune admin center with an account that can create configuration profiles.
Then complete these steps:
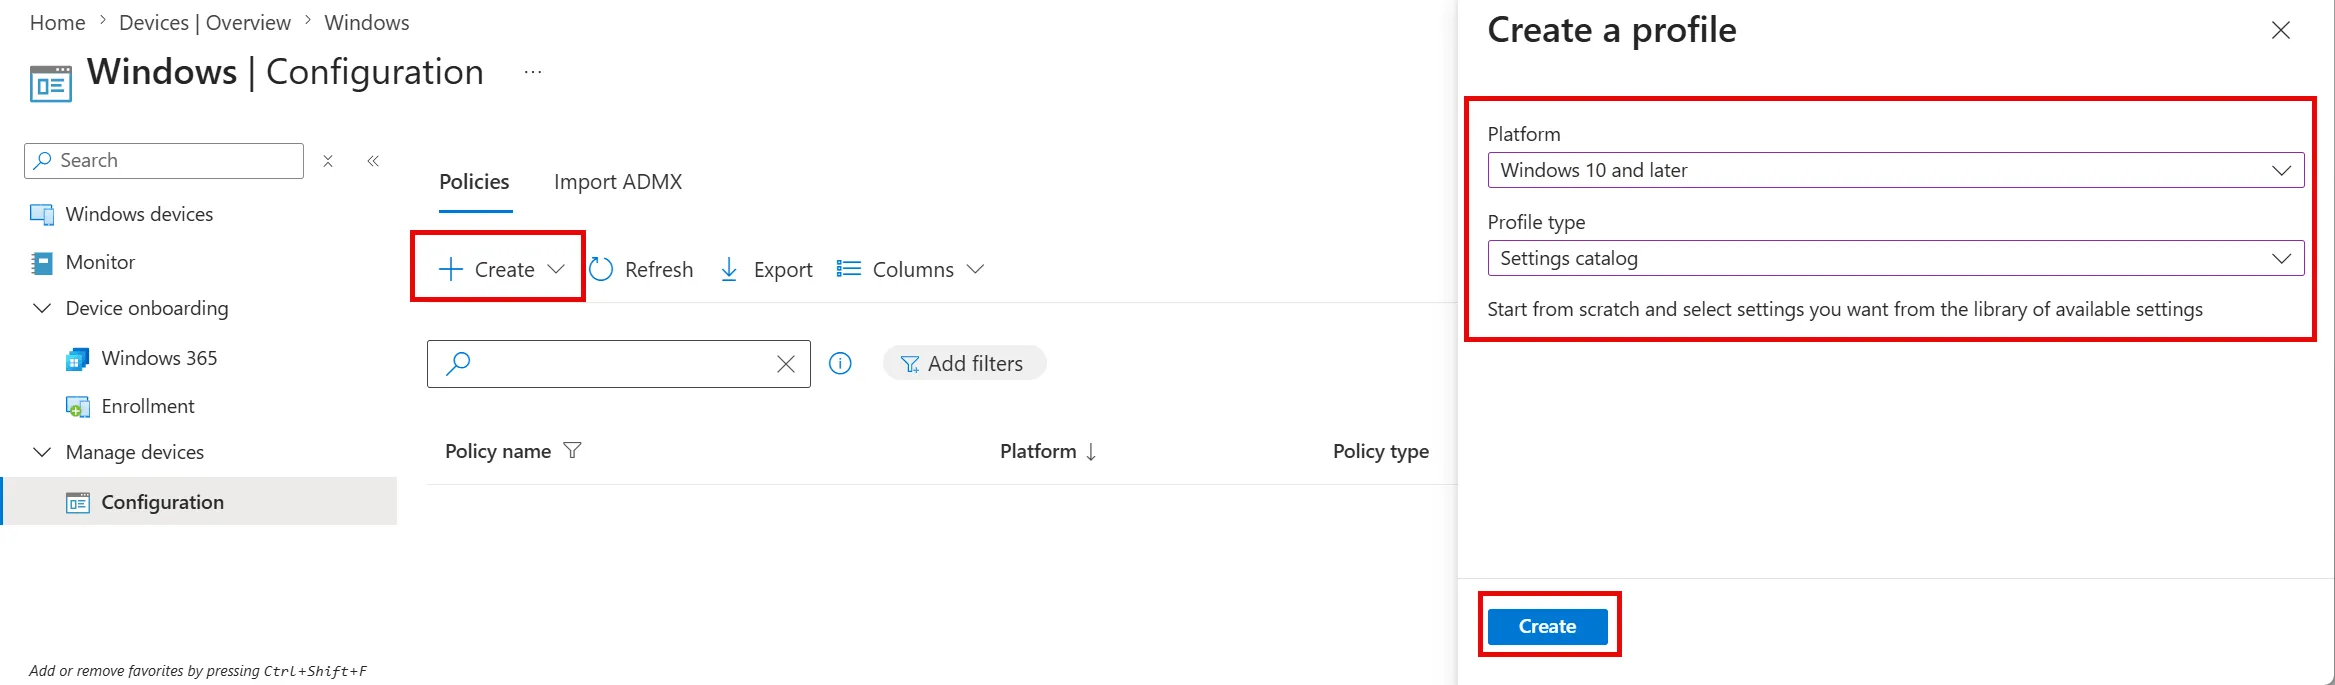
- Open Devices.
- Select Manage devices.
- Select Configuration.
- Select Create and then New policy.
- Configure the following values:
| Setting | Value |
|---|---|
| Platform | Windows 10 and later |
| Profile type | Settings catalog |
- Select Create.
Configure profile details
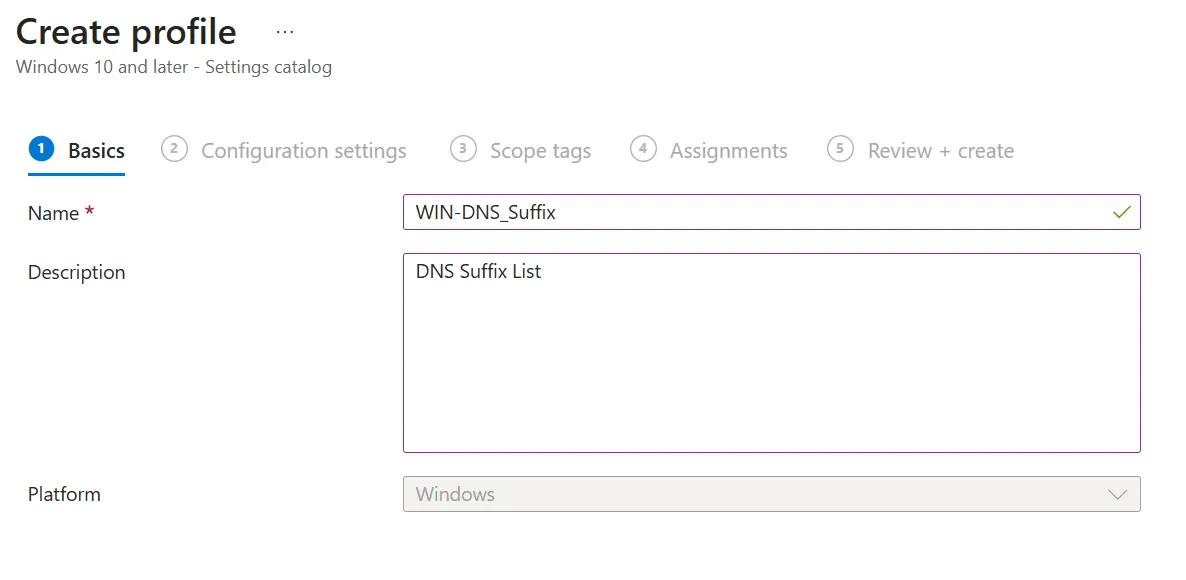
Next, enter a clear profile name and description.
The name follows my naming convention. Adjust it for your environment.
Select Next after entering the profile information.
Add the DNS suffix search list
Under Configuration settings, select Add settings.
Search for:
DNS Suffix Search ListAdd the matching setting to the profile. This is an ADMX-backed setting that applies to devices, not individual users.
Enable it and add your required DNS suffixes.
Separate multiple suffixes with commas:
ad.scloud.es,sub.ad.scloud.es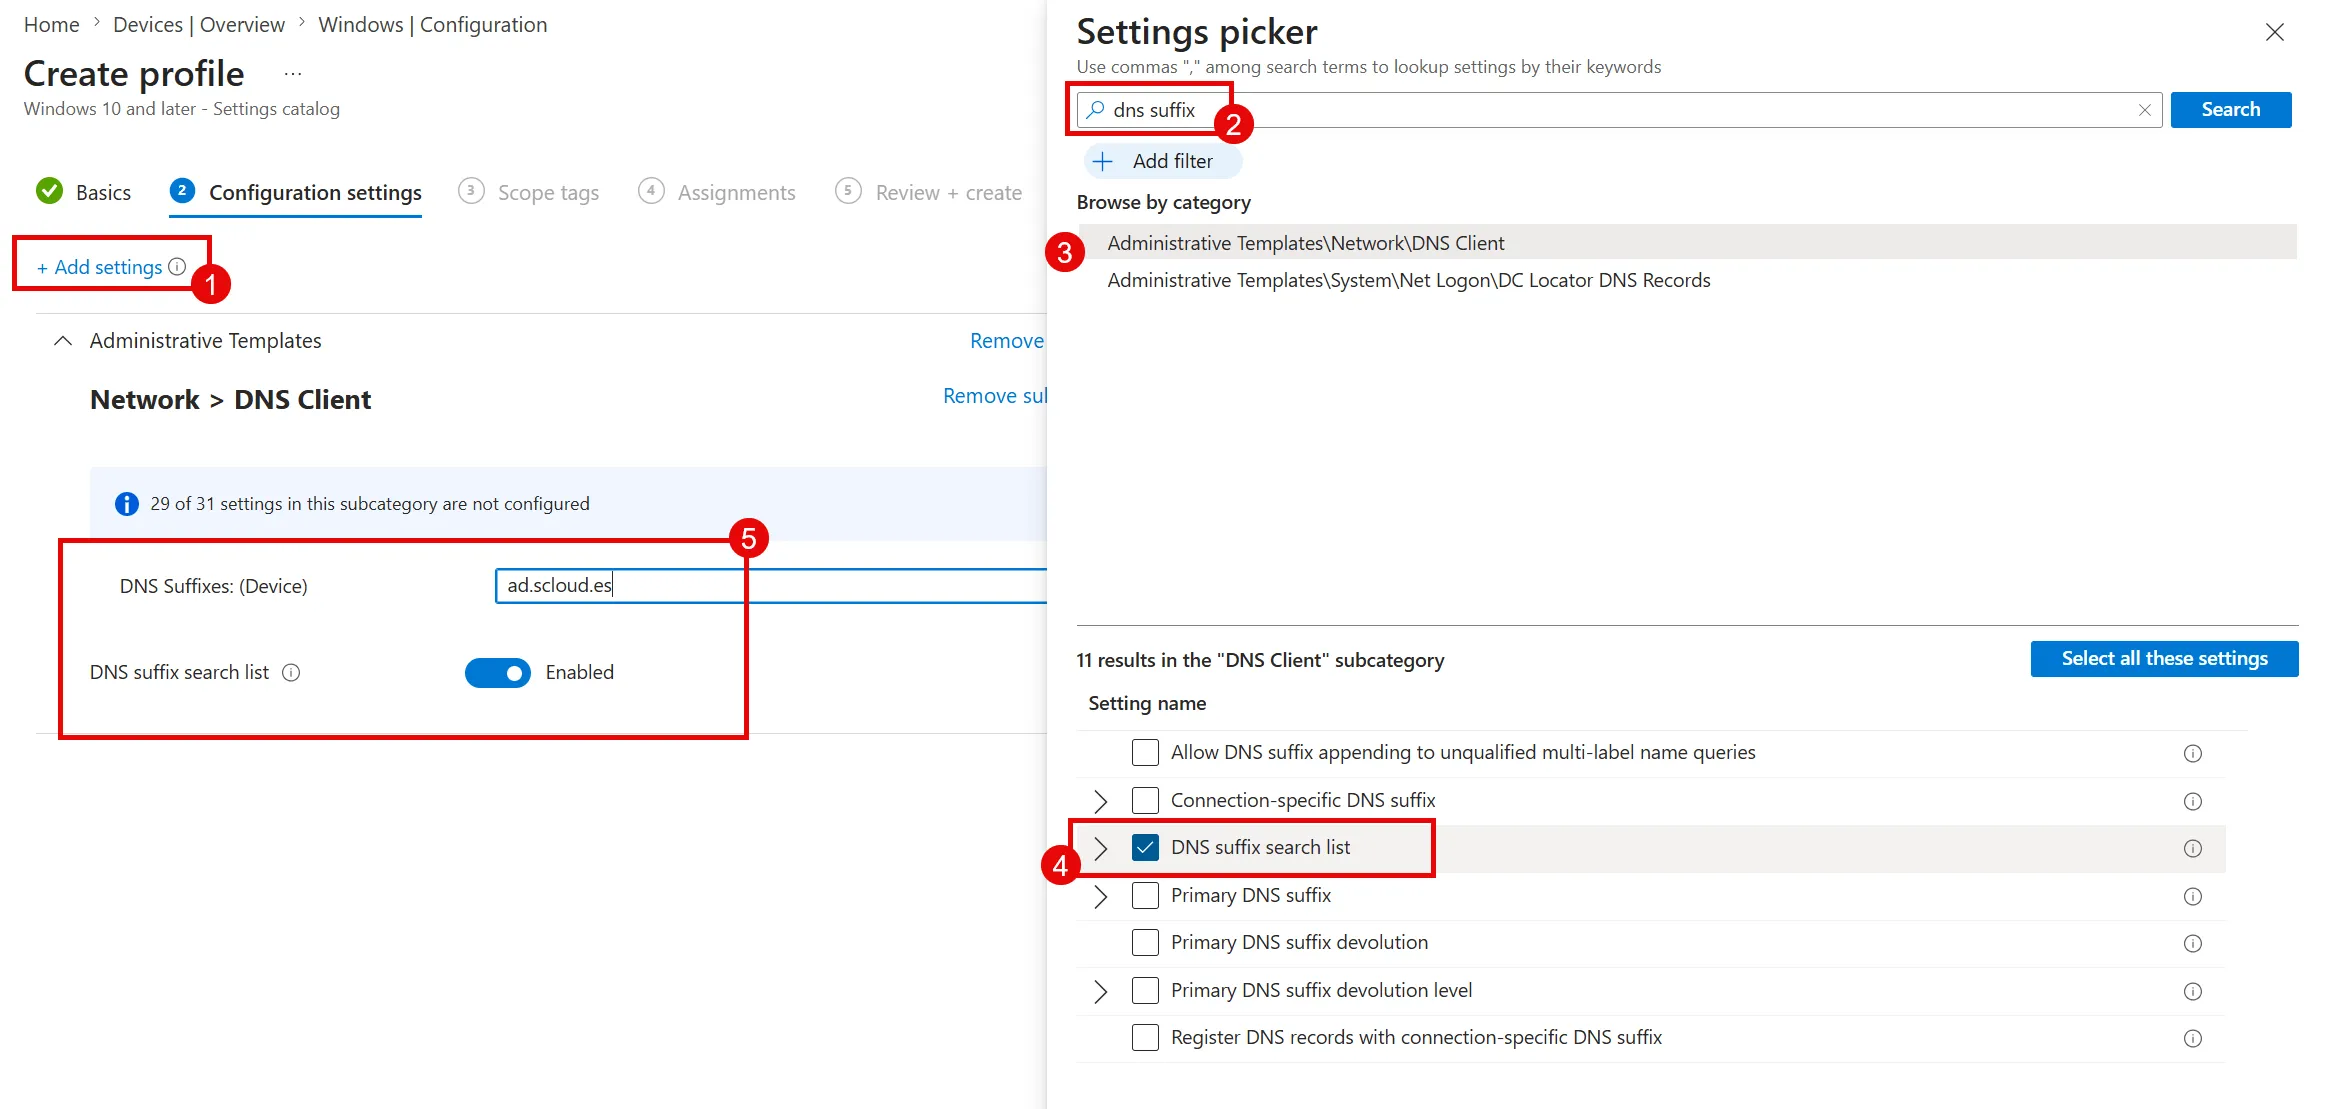
Assign the profile to test devices
Select Next until you reach Assignments.
I recommend assigning the profile to a dedicated test device group first. Avoid deploying a new network configuration directly to production.
Then:
- Add your test device group.
- Review the configured settings.
- Select Create.
- Sync one assigned test device.
Verify the deployment
Always test policies and profiles before rolling them out broadly.
A successful Intune status confirms policy processing. I also verify the effective client-side configuration directly on the device.
This two-step validation helps identify assignment, synchronization, and client configuration issues.
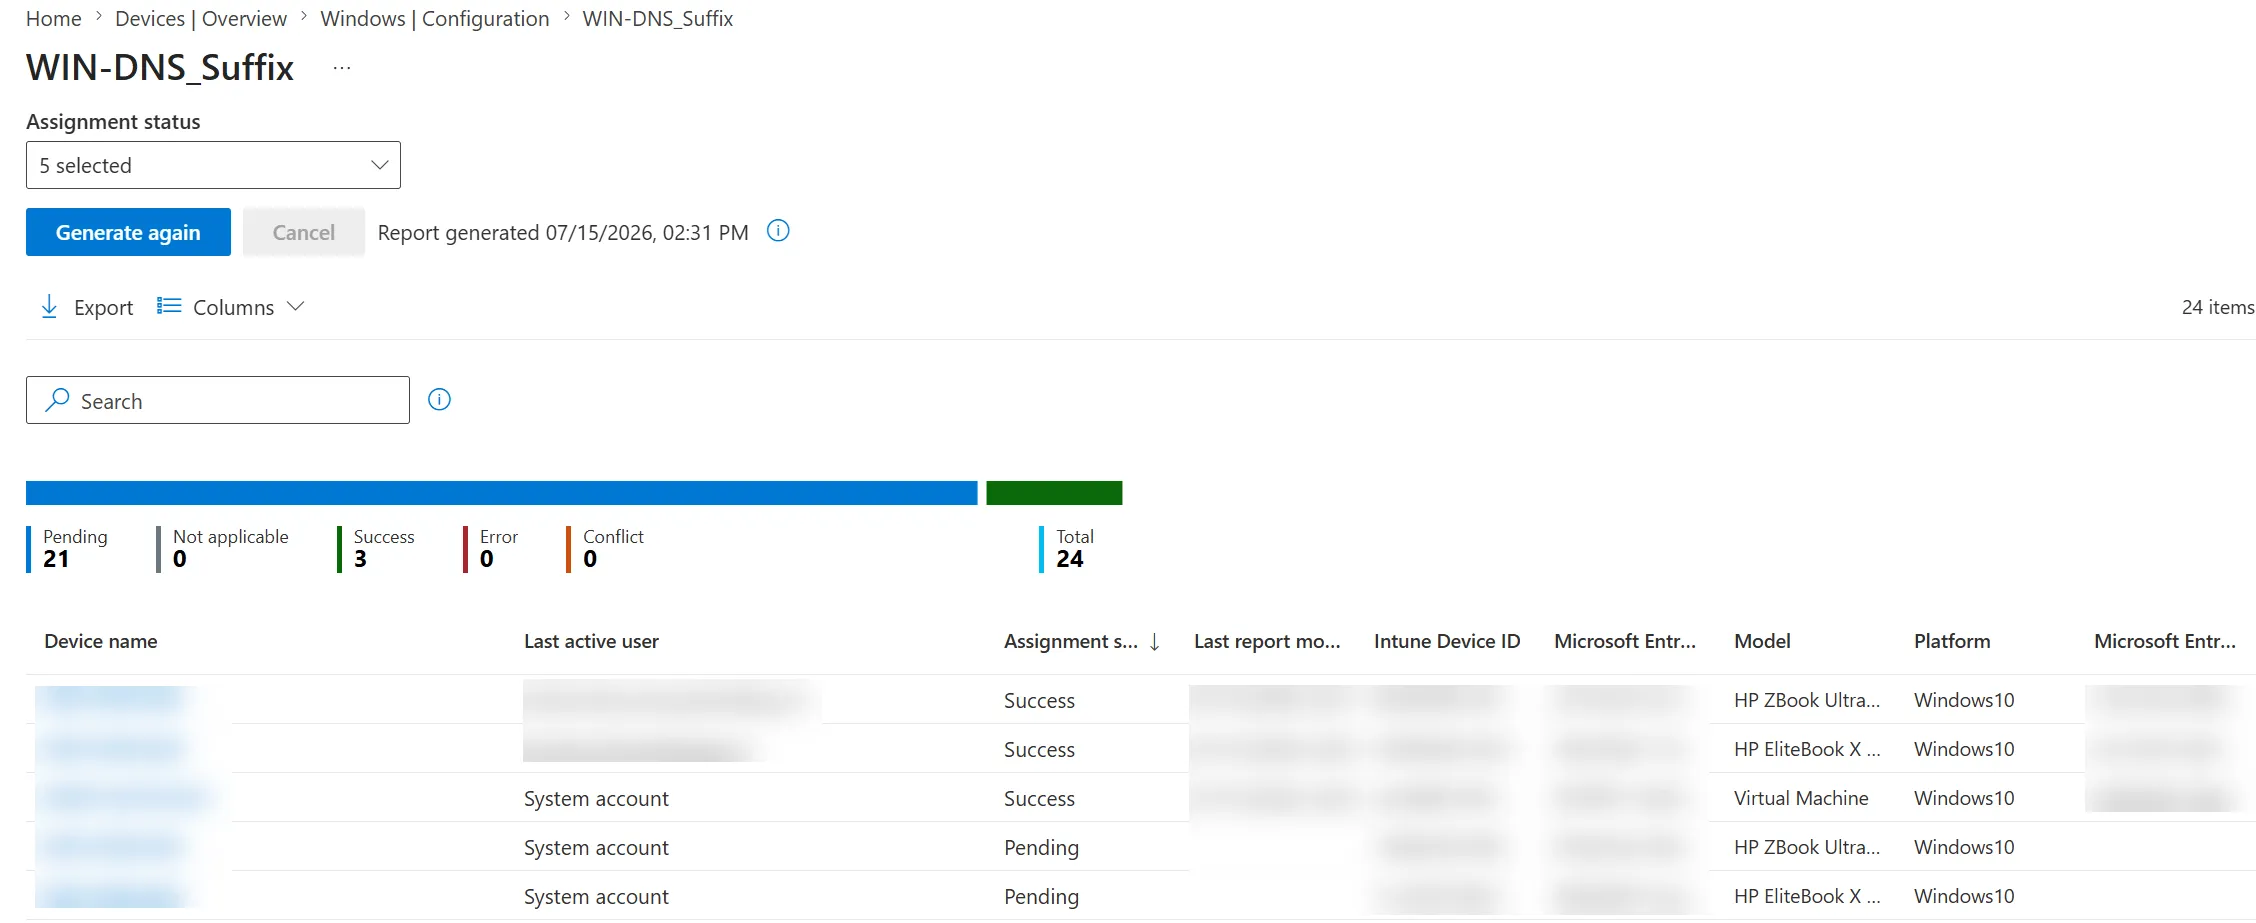
Check status in Microsoft Intune
Open the configuration profile in the Intune admin center.
Then review Device status or Device and user check-in status.
The test device should report Succeeded.
If Intune reports an error, review the setting name, assigned group, and device compatibility. After changes, sync the device again.
Verify DNS suffixes on the client
I use PowerShell to verify the effective DNS suffix search list:
Get-DnsClientGlobalSetting | Select-Object -ExpandProperty SuffixSearchListThe command should return all configured suffixes:
ad.scloud.es
Then run an additional resolution test with a short hostname:
Resolve-DnsName fileserverFor an end-to-end test, access the internal resource without the full domain:
\\fileserver\shareIf name resolution works, Windows appended a configured suffix successfully.
Deploy to production
After successful testing, expand the assignment to your production device group.
Monitor deployment status during rollout. A staged deployment reduces risk and makes troubleshooting easier.
With this setup, users can access internal resources using short hostnames without typing the full FQDN.