Windows Autopilot Registration with App registration
- Florian Salzmann
- Posted on 05 Sep, 2023
- Updated on 13 Aug, 2024
- 05 Mins read
- Microsoft Intune,Windows Autopilot
Today, we’re going to explore the wonderful world of Automation. This time for uploading the Windows Autopilot Hardware Hast to Intune - of course using the power of PowerShell. Say goodbye to manual registrations with the need to enter an Administrator and hello to a more straightforward automated registration for Autopilot! 🚀
Understanding the Script
Here’s a breakdown of the steps involved in automating these installations:
Set the Execution Policy
To get started, we need to set the execution policy using the Set-ExecutionPolicy command. Think of it as the bouncer at the PowerShell club, ensuring that our script can run smoothly without any restrictions. We don’t want any party crashers, right? 😄
Set-ExecutionPolicy -Scope Process -ExecutionPolicy Unrestricted -ForceInstall required components
Now, let’s bring in the necessary ingredients for our automation recipe. We’ll use the Install-PackageProvider command to install the NuGet package provider. This handy provider helps us easily acquire other packages we need for the Autopilot and Intune magic to happen.
Install-PackageProvider -Name NuGet -Force | Out-NullInstall script and module
It’s time to bring in the stars of our show! We’ll use the Install-Script command to install the awesome script called “Get-WindowsAutoPilotInfo”. This script helps us gather all the juicy Autopilot information we need. But wait, there’s more! We also need the WindowsAutopilotIntune module, which can be installed with the Install-Module command. It’s like having the perfect cast for our tech blockbuster! 🎥🍿
Install-Script -Name Get-WindowsAutoPilotInfo -Force | Out-Null
Install-Module -Name WindowsAutopilotIntune -Force | Out-Null
Prompt for the Group Tag
Now, let’s add a little spice to our automation recipe. We’ll prompt you, the wizard behind the screen, to enter a Group Tag for uploading. This Group Tag helps categorize the uploaded data and makes your life a whole lot easier when managing multiple uploads. You can enter a Group Tag to keep things organized, or simply press Enter to continue without one. Your call, maestro! 🎵
$GroupTag = Read-Host "To upload with a Group Tag, enter the Group Tag now. Otherwise, press Enter to continue without a Group Tag."Get Windows Autopilot Info
Drumroll, please! It’s time to gather all the Autopilot secrets using the script we installed earlier. We’ll use the Get-WindowsAutoPilotInfo command with the parameters stored in our hash table called $AutopilotParams. This command will retrieve the Autopilot information from the online service using your specified credentials and group tag (if provided) and handles the registration.
Sit back, relax, and let the magic happen! ✨
$AutopilotParams = @{
Online = $true
TenantId = "xxxxxxxx-xxxx-xxxx-xxxx-xxxxxxxxxxxx"
AppId = "xxxxxxx-xxxx-xxxx-xxxx-xxxxxxxxxxxx"
AppSecret = "xxxx~xxxxxxxxxxxxxx~xxxxxxxxxxxxxxxxxxxxx"
GroupTag = "$GroupTag"
}

Get-WindowsAutoPilotInfo @AutopilotParams
Remember to customize the parameters with your own credentials and group tags to make the magic work seamlessly for your specific setup. Happy automating and may your IT adventures always be filled with joy and triumph! 🎉🔥
The App Registration
The App registration allows us to run the script without an interactive authentication.
Creating the App registration
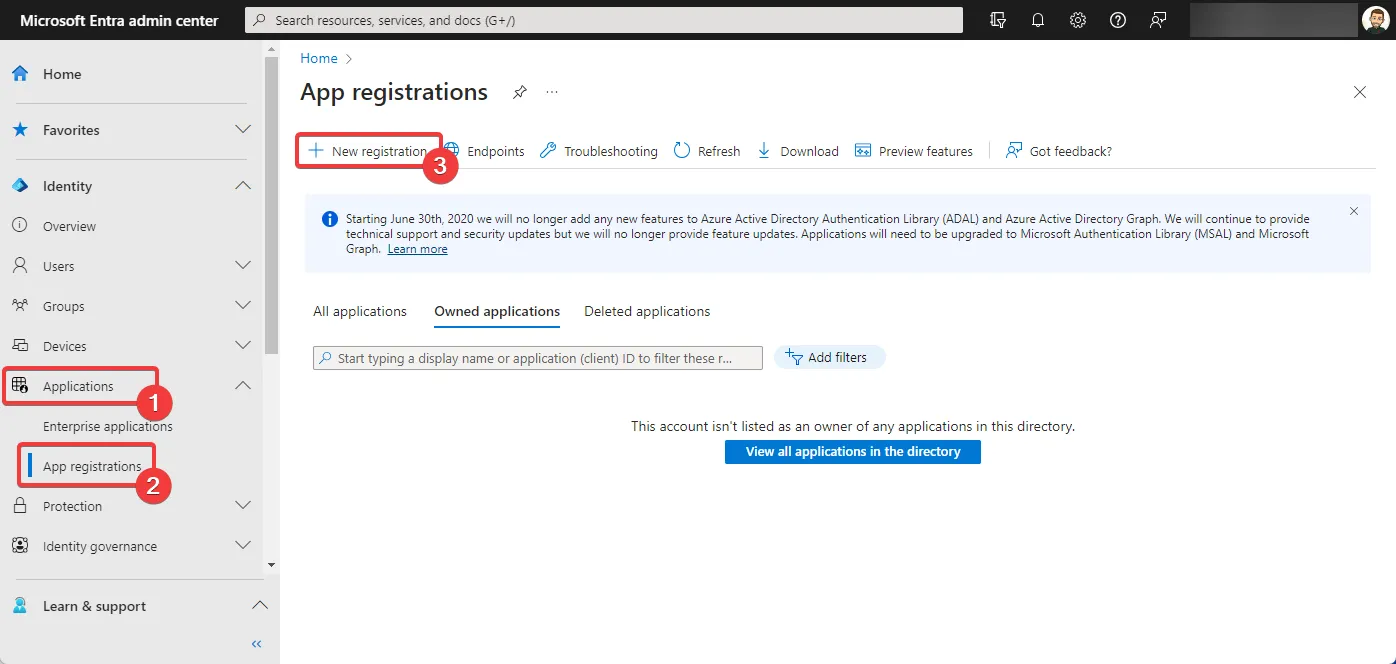
To create the App registration with the necessary permissions head over to Entra.
Applications > App registrations > + New registration
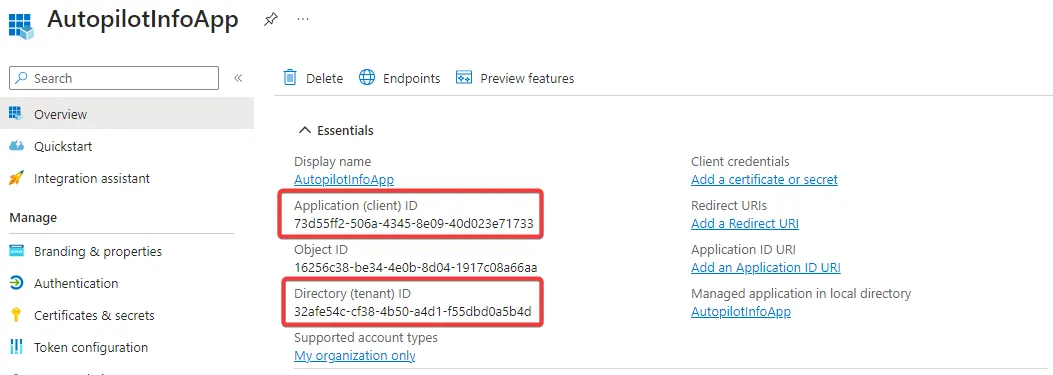
Here you give the App a nice name and click “Register”.
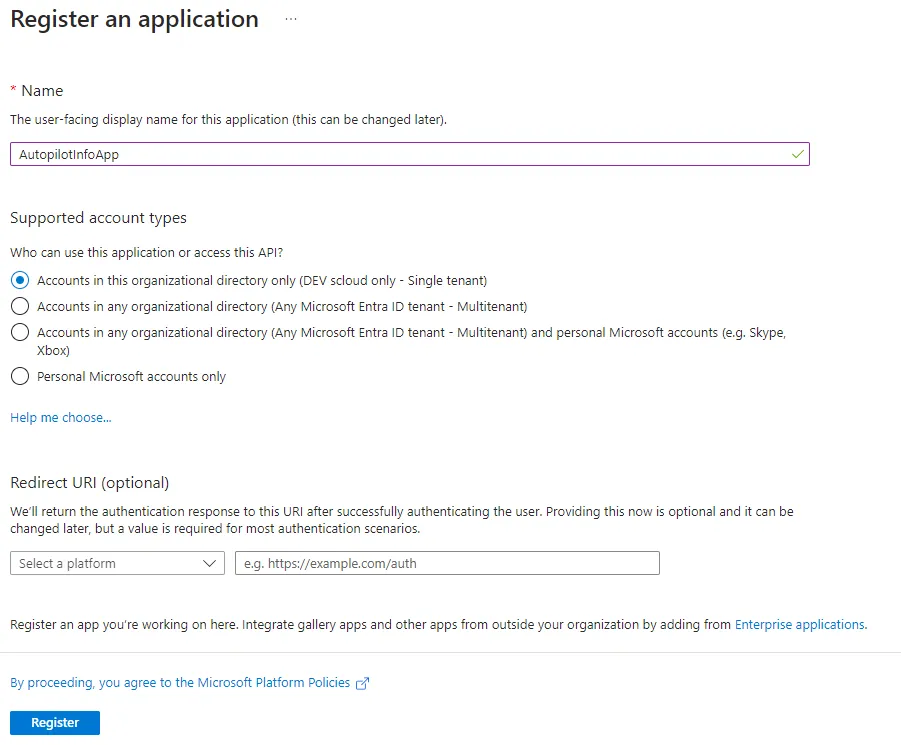
On the Homescreen of the app you can copy/paste the App ID and Tenant ID to your script.
Creating the App secret
In the App navigate to “Certificates & secrets” and click ”+ New client secret”.
Here you define a Name for teh Secret and a lifetime. The maximum is 2 years.
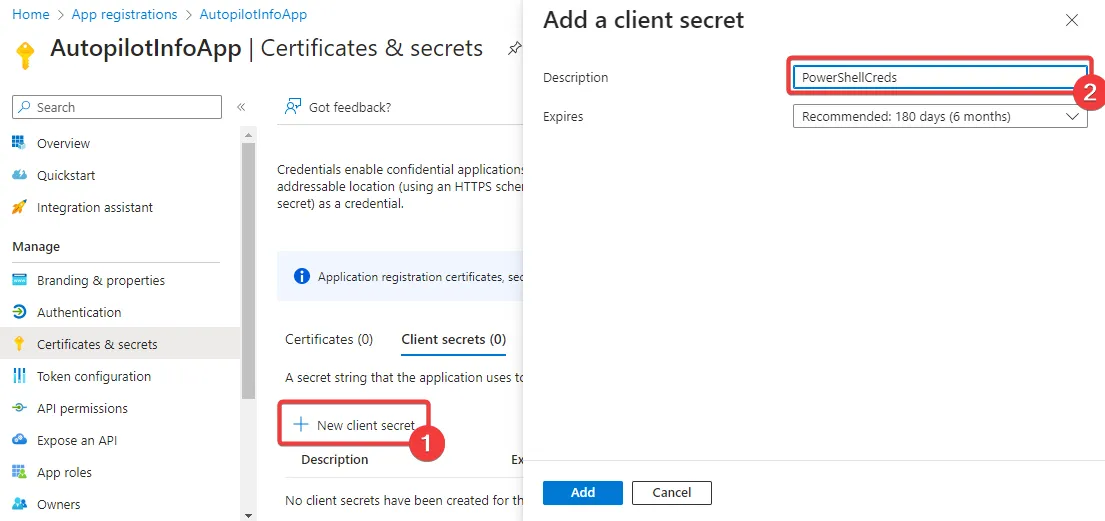
Copy the created Secret Value into your script. The Value will be shown only once, after that you cannot retrieve is a second time.

Assign permissions to our App
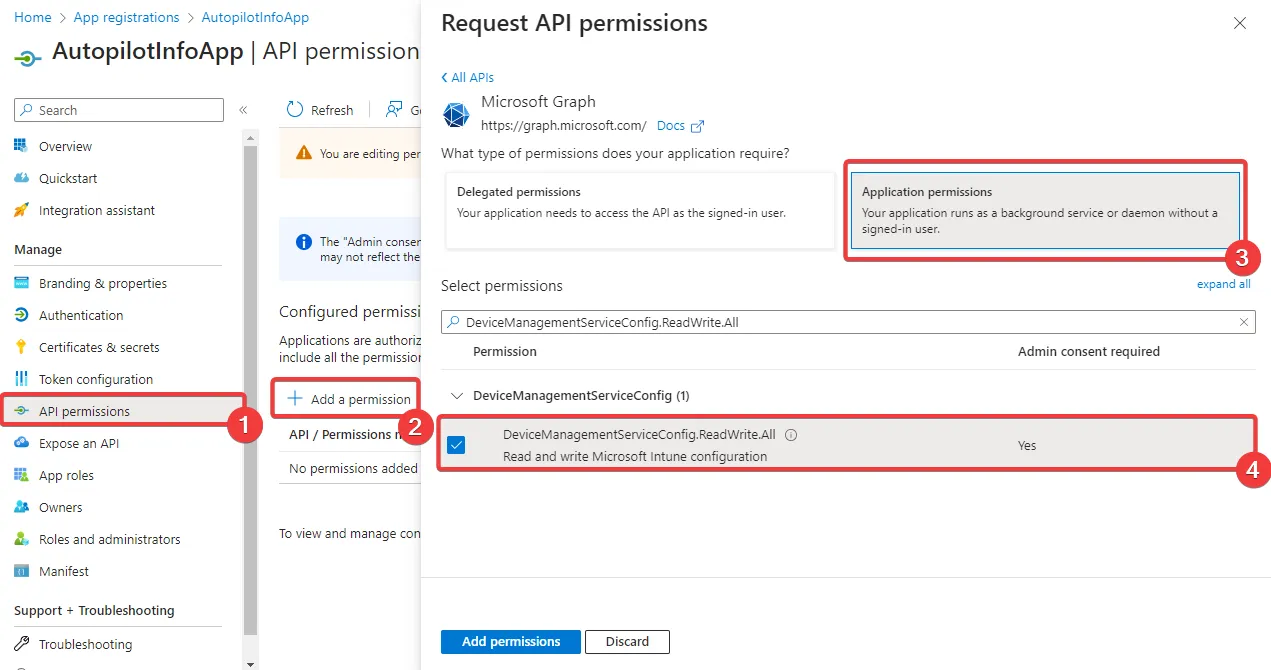
In the tab “API permissions” we can remove the already present “User.Read” permission and add “DeviceManagementServiceConfig.ReadWrite.All”.
This is the least permission to allow an Autopilot registration.
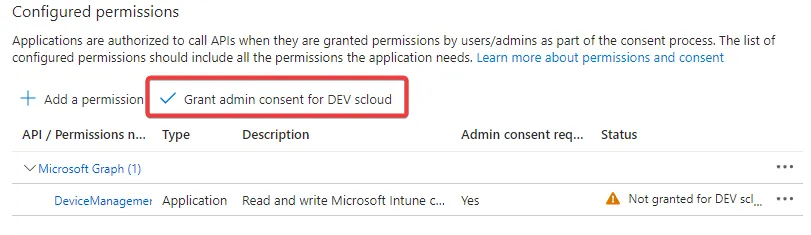
After adding the permission it’s very important to approve it:
Create an EXE from the Script (optional)
To advise users to run the Script with a right click and “Eun with PowerShell” is not always going to work. For a more convenient user experience you can use the PowerShell Module “ps2exe” to create an EXE.
# Module Installation
Install-Module -Name ps2exe

# Convert to EXE
ps2exe -inputFile "C:\..\Autopilot-Registration.ps1" -outputFile "C:\..\Autopilot-Registration.exe"
Collect Autopilot Hash via GPO
For an even smoother deployment across your organization, you can automate the collection of Windows Autopilot hardware hashes by deploying the script via Group Policy Object (GPO) as an immediate scheduled task. This method ensures that all targeted devices will execute the script without requiring manual intervention, making the process of collecting and registering Autopilot information both scalable and efficient.
Prepare the Script
Before deploying the script via GPO, ensure that the script for collecting the Autopilot hash is ready. You can use the same as abbove, but make shure that no user interactions are required. In my other example is a interaction for the GroupTag. The following one can be used directly and you can hardcode a GroupTag:
Create a Immediate Scheduled Task via GPO
- Open Group Policy Management:
- On a domain controller or a machine with Group Policy Management tools installed, open the Group Policy Management Console (GPMC).
- Create a New GPO:
- Right-click on the appropriate Organizational Unit (OU) or domain where you want the policy to apply, and select Create a GPO in this domain, and Link it here….
- Name the GPO something descriptive like “Deploy Autopilot Hash Collection Script.”
- Edit the GPO:
- Right-click the newly created GPO and select Edit.
- Navigate to Scheduled Tasks:
- In the Group Policy Management Editor, go to:
Computer Configuration -> Preferences -> Control Panel Settings -> Scheduled Tasks - Right-click and select New -> Immediate Task (At least Windows 7).
- In the Group Policy Management Editor, go to:
- Configure the Task:
- General Tab:
- Name:
Collect Autopilot Hash - Security Options: Choose Run whether user is logged on or not and Run with highest privileges.
- Name:
- Triggers Tab:
- Click New… and set the task to trigger At startup or as needed. This ensures the task runs as soon as the device is started or according to your preferred schedule.
- Actions Tab:
- Click New… and set the action to Start a program.
- Program/script:
powershell.exe - Add arguments:
-ExecutionPolicy Bypass -File "\\YourDomain\Path\To\Script\Collect-Autopilot-Hash.ps1" - Note: Replace
\\YourDomain\Path\To\Script\Collect-Autopilot-Hash.ps1with the actual UNC path where your script is stored.
- Conditions Tab:
- Configure any additional conditions if needed (e.g., only run if the computer is idle).
- Settings Tab:
- Optionally configure settings like “Allow task to be run on demand” or “Stop the task if it runs longer than…”.
- General Tab:
- Deploy the GPO:
- Once the GPO is configured, it will be applied to all computers within the selected OU at the next policy refresh (deafult every 90min).
Monitoring and Troubleshooting
- After deployment, you can monitor the success of the script execution through the Task Scheduler on client machines or by reviewing logs generated by the script (if you’ve included logging within the script).
- If any issues arise, ensure that the script path is accessible to all targeted machines and that the scheduled task has been properly configured.
With this setup, your organization can seamlessly collect and upload Autopilot (registration) hashes for existing devices, making the Autopilot deployment process more automated and hassle-free. Happy deploying! 🎉