How to Install winget in Windows Sandbox
- Florian Salzmann
- Posted on 08 Oct, 2026
- 03 Mins read
- Windows 11,PowerShell
Windows Sandbox does not come with winget preinstalled. Every time you launch a fresh sandbox, you get a clean, disposable copy of Windows with no Microsoft Store and no App Installer — which means the winget command fails until you install it yourself.
That’s actually useful: a sandbox with winget bootstrapped on demand is a safe, disposable way to test installers, scripts, or winget install commands without touching your real machine. Here’s how to turn the sandbox on, see the “not found” error for yourself, and get winget working in under a minute.
Table of Contents
Open Table of Contents
What Is Windows Sandbox?
Windows Sandbox is a lightweight, temporary desktop environment built into Windows 10 and 11. It runs in an isolated virtual instance, uses its own kernel via hardware virtualization, and throws away everything — installed apps, files, registry changes — the moment you close it.
Requirements:
- Windows 10/11 Pro, Enterprise, or Education (not available on Home)
- Virtualization support enabled in the BIOS/UEFI (the same setting Hyper-V and WSL2 need)
- At least 4 GB RAM and 1 GB free disk space (Microsoft’s minimum; more is better)
Enabling Windows Sandbox
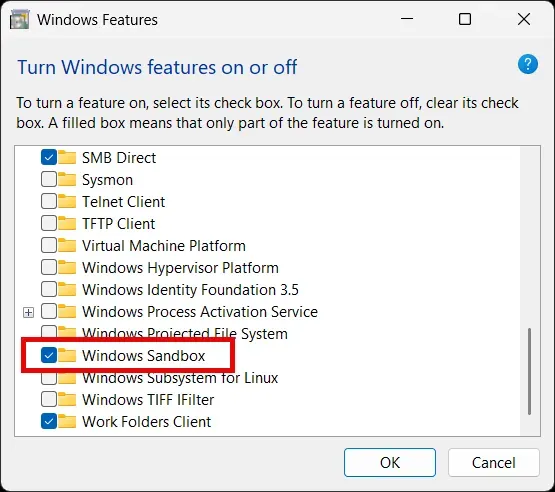
Windows Sandbox is an optional Windows feature, so it’s off by default. You can turn it on either through the GUI or with PowerShell.
Settings UI:
- Open Control Panel → Programs → Turn Windows features on or off.
- Check Windows Sandbox.
- Click OK and reboot when prompted.
PowerShell (run as Administrator):
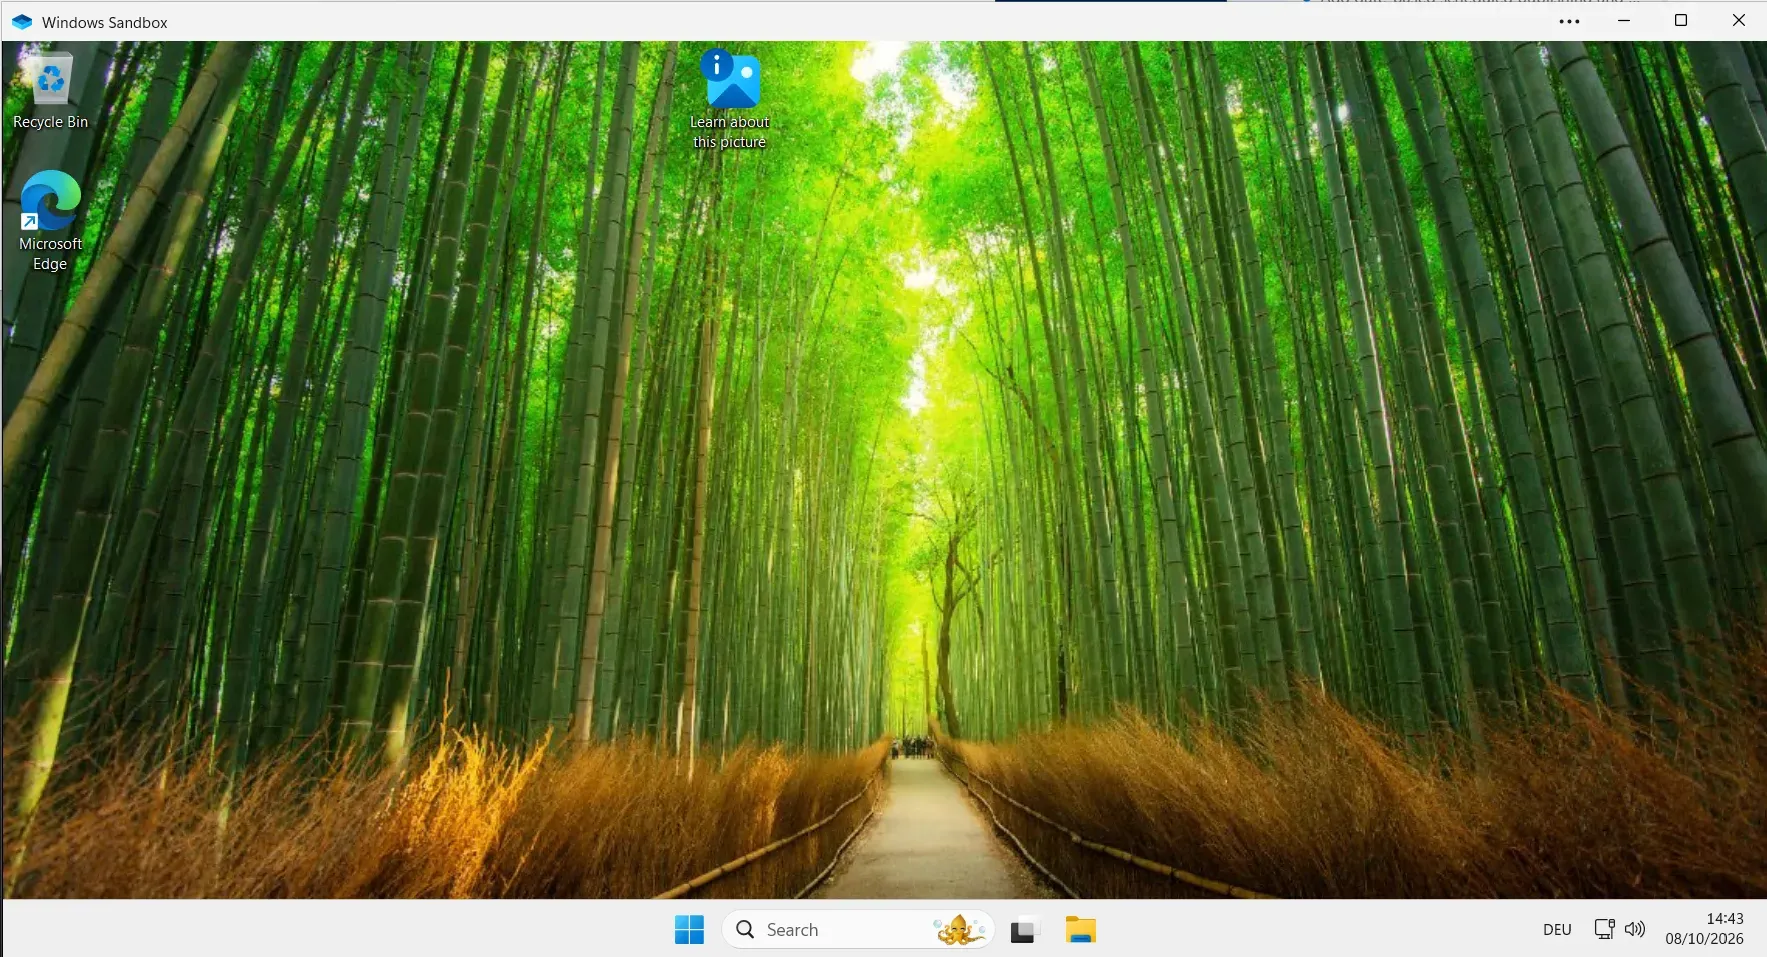
Enable-WindowsOptionalFeature -FeatureName "Containers-DisposableClientVM" -Online -NoRestart -ErrorAction StopRestart when it finishes, then search for Windows Sandbox in the Start menu and launch it.
The Default State: winget Is Not Found
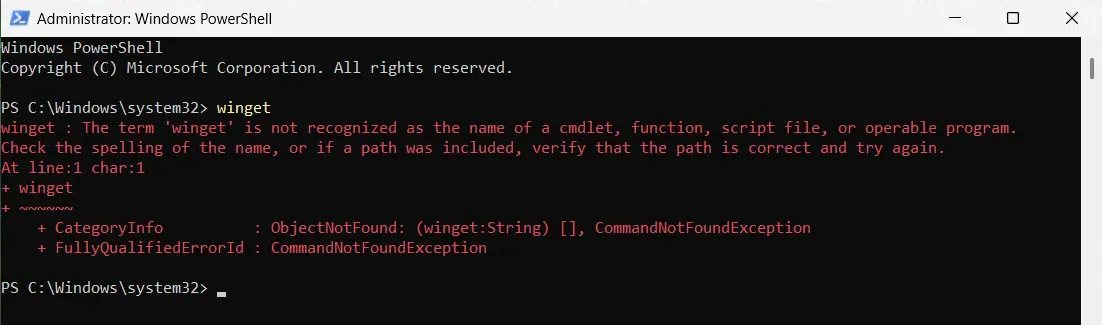
Open a PowerShell or Command Prompt window inside the sandbox and run:
winget --versionYou’ll get:
winget : The term 'winget' is not recognized as the name of a cmdlet, function, script file, or operable program.
Check the spelling of the name, or if a path was included, verify that the path is correct and try again.
This isn’t a bug — the sandbox boots from a minimal, clean Windows base image that skips the Microsoft Store and its pre-bundled apps, and winget ships as part of the App Installer package, which normally comes from the Store. No Store, no App Installer, no winget.
Installing winget with PowerShell
You can install winget inside the sandbox without going through the Microsoft Store, using the official Microsoft.WinGet.Client PowerShell module:
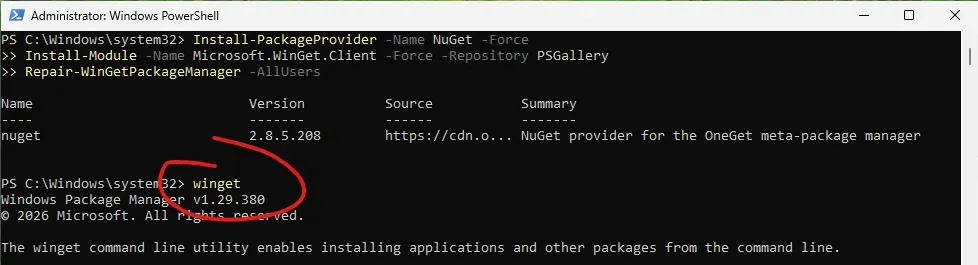
Install-PackageProvider -Name NuGet -Force
Install-Module -Name Microsoft.WinGet.Client -Force -Repository PSGallery
Repair-WinGetPackageManager -AllUsers
What each line does:
Install-PackageProvider -Name NuGet -Force— installs the NuGet provider PowerShell needs to pull modules from an online gallery.Install-Module -Name Microsoft.WinGet.Client -Force -Repository PSGallery— installs Microsoft’s officialwingetmanagement module from the PowerShell Gallery.Repair-WinGetPackageManager -AllUsers— the actual fix: this cmdlet downloads and registers the App Installer package (which containswinget.exeitself) for every user on the machine, bypassing the need for the Store.
Verifying the Install
Confirm winget is now available:
winget --versionwinget search vscodeIf both commands return output instead of an error, winget is installed and ready to use inside the sandbox — as you can already see in the screenshot above, where winget --version returns a version number right after Repair-WinGetPackageManager finishes.
Bonus: Auto-Installing winget on Every Sandbox Launch
Windows Sandbox resets completely on every restart, so winget won’t persist between sessions. If you use the sandbox regularly for testing, save yourself the manual steps with a .wsb config file that runs the install snippet automatically at logon:
<Configuration>
  <LogonCommand>
    <Command>powershell -ExecutionPolicy Unrestricted -Command "Install-PackageProvider -Name NuGet -Force; Install-Module -Name Microsoft.WinGet.Client -Force -Repository PSGallery; Repair-WinGetPackageManager -AllUsers"</Command>
  </LogonCommand>
</Configuration>
Save it as winget-sandbox.wsb and double-click it — the sandbox starts with winget already bootstrapped by the time you’re at the desktop. For more advanced .wsb patterns (mapping a host folder in, auto-installing PowerShell modules), see Pre-Installed PowerShell Modules in Windows Sandbox.
FAQ
Does Windows Sandbox come with winget by default?
No. Windows Sandbox boots a minimal, Store-free image, so winget — which ships as part of the App Installer package — is missing until you install it yourself.
Why does winget say “not recognized” in Windows Sandbox?
Because winget.exe isn’t present on disk yet. The sandbox has no Microsoft Store and no pre-installed App Installer, so there’s nothing for the shell to find until you run Repair-WinGetPackageManager.
Does winget persist across sandbox restarts?
No. Every Windows Sandbox session starts from a fresh, disposable image, so any changes — including an installed winget — are gone once you close the window. Use a .wsb logon command to reinstall it automatically each time.
Which Windows editions support Windows Sandbox? Windows 10 and 11 Pro, Enterprise, and Education, with virtualization enabled. Windows Home does not support Windows Sandbox.
If you test installers, scripts, or
winget installcommands regularly, a disposable sandbox withwingetbootstrapped on demand is the safest way to do it — nothing you run there ever touches your real machine.