Create Your Own Hyper-V Intune Lab on Azure: A Step-by-Step Guide
- Florian Salzmann
- Posted on 01 Dec, 2025
- Updated on 15 Oct, 2026
- 05 Mins read
- Microsoft Intune
I often use an Azure-based Hyper-V VM to test Intune deployments, preview features, and real-world scenarios across different tenants. With nested virtualization, I get a fully isolated Intune lab environment that I can start and stop on demand, without touching production systems.
In this guide, I’ll show you how to build your own Hyper-V Intune Lab on Azure step by step.
You’ll end up with:
- One Azure VM with nested virtualization
- A fully functional Hyper-V host inside Azure
- An internal DHCP + NAT network
- A Windows 11 test VM ready for Intune and Autopilot testing
Why a Hyper-V Intune Lab on Azure?
Running Hyper-V inside an Azure VM gives you a lab you can build, break and rebuild at will:
- Cost-effective: You only pay while the VM is running.
- Isolated testing: No risk for your productive Intune tenant.
- Multi-tenant ready: Perfect for consultants and MVPs.
- Real-world simulation: Full Windows provisioning, Autopilot, and policy testing.
- Reset in minutes: Destroy and redeploy at any time.
Expected Azure Costs
Azure costs depend heavily on region and runtime, but as a rough orientation:
- Recommended size: Standard D8s v5 (32 GB RAM). A D4s v5 (16 GB) works for one small VM, but Windows 11 runs poorly in a VM with less than 12 GB, so the host needs the headroom.
- Price range: ~CHF 0.20 – 0.50 per hour (depending on region)
- OS disk: ~CHF 5–15 per month
- Data disk: depends on the size and type you pick
- Public IP: minimal cost
Always deallocate the VM when you are not using it. A VM that is only stopped inside Windows still bills for compute.
Choosing the Right Azure VM
Not every Azure VM supports nested virtualization, and you cannot turn it on later. Pick a supported size when you create the VM, or you have to redeploy.
At the time of writing, these SKU families are supported:
- D_v3
- Ds_v3
- Dv4
- Dsv4
- Ddv4
- Ddsv4
- Dv5
- Dsv5
- E_v3
- Es_v3
- Ev4
- Esv4
- Edv4
- Edsv4
- F2s_v2 - F72s_v2
- FX4 - FX48
- M
- Mv2
Newer series are supported too, for example the Dv5 and Dsv5 I recommend above. Every size series page on Microsoft Learn lists “Nested Virtualization” in its feature support table, so check there before you deploy:
- Dsv5 size series - Azure Virtual Machines | Microsoft Learn
- Run Hyper-V in a Virtual Machine with Nested Virtualization | Microsoft Learn
Important Limitations
- B-series VMs are NOT supported
- Standard security type must be used
Create the Azure VM
- Log in to the Azure Portal
- Click Create a resource
- Search for Virtual Machine
- Select your Subscription and Resource Group
- Configure the VM:
- Image: Windows Server 2022
- Size: D8s v5 (32 GB RAM) recommended
- Security Type: Standard (NOT Trusted Launch)
- Public IP: Required for initial RDP access
- Under Disks, add a new data disk for your nested VMs. Configure networking as needed
- Review and create the VM
Once deployment is complete, connect via RDP to your new Azure VM.
Enable Hyper-V and DHCP (Clean Setup)
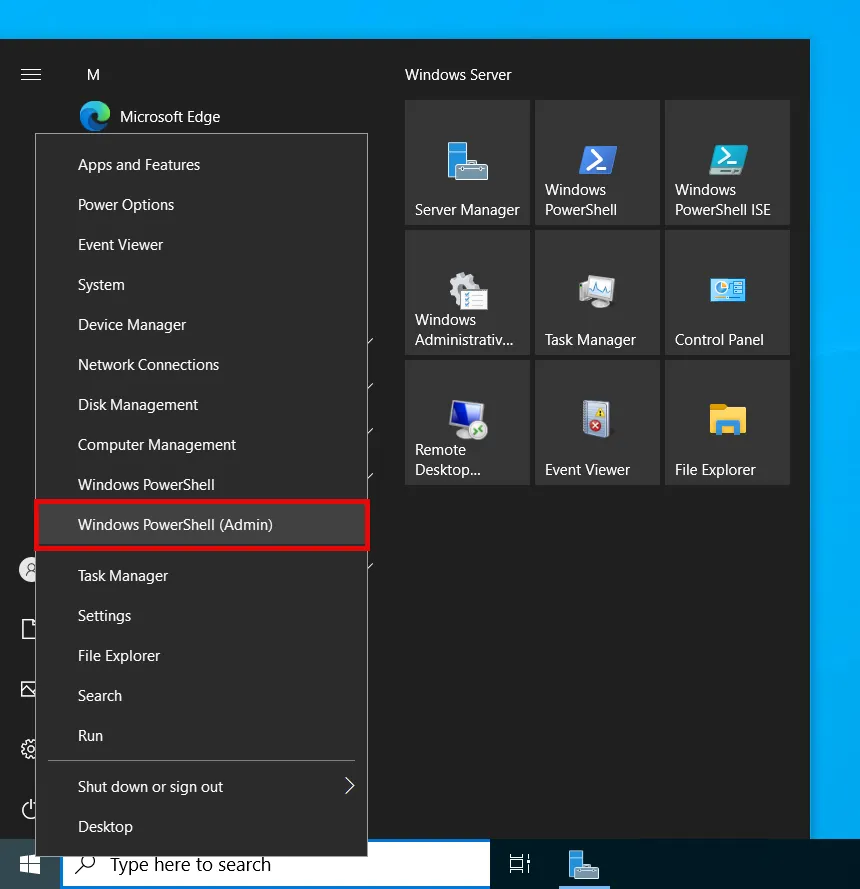
Open PowerShell as Administrator and run the two scripts below.
Together they:
- Installs Hyper-V
- Installs DHCP
- Creates an internal virtual switch
- Configures NAT
- Creates a DHCP scope
- Run the first script. At the end,
dismasks whether to restart. Type Y. You need this reboot before you continue.
# Install required Windows features
Install-WindowsFeature -Name DHCP, Hyper-V –IncludeManagementTools

# Enable Hyper-V feature using dism
dism /Online /Enable-Feature /FeatureName:Microsoft-Hyper-V /All

# Here you need to restart your VM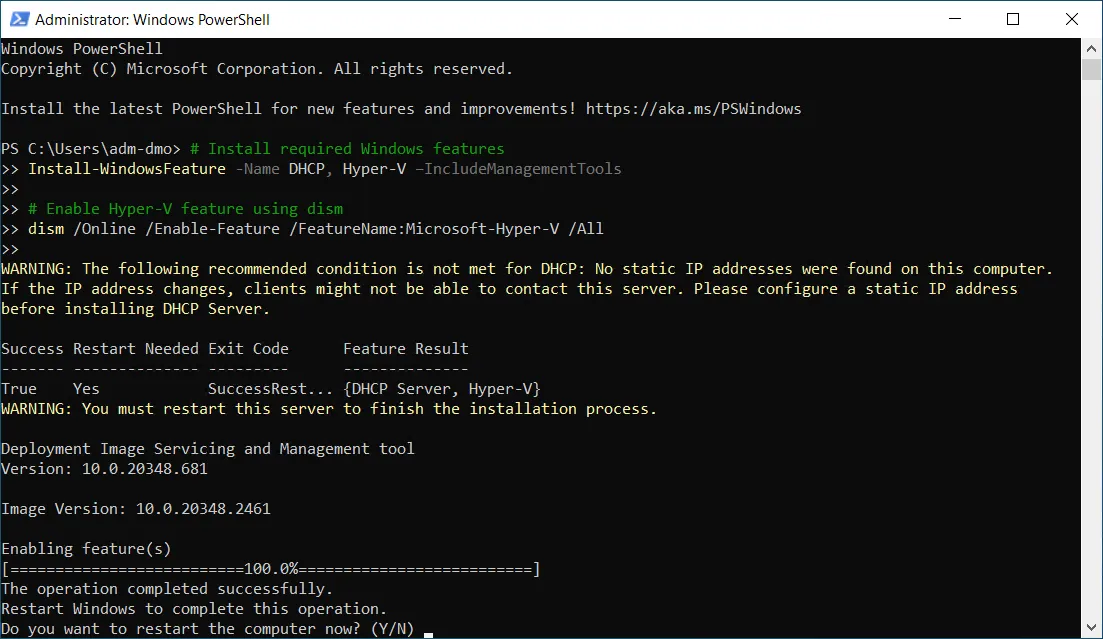
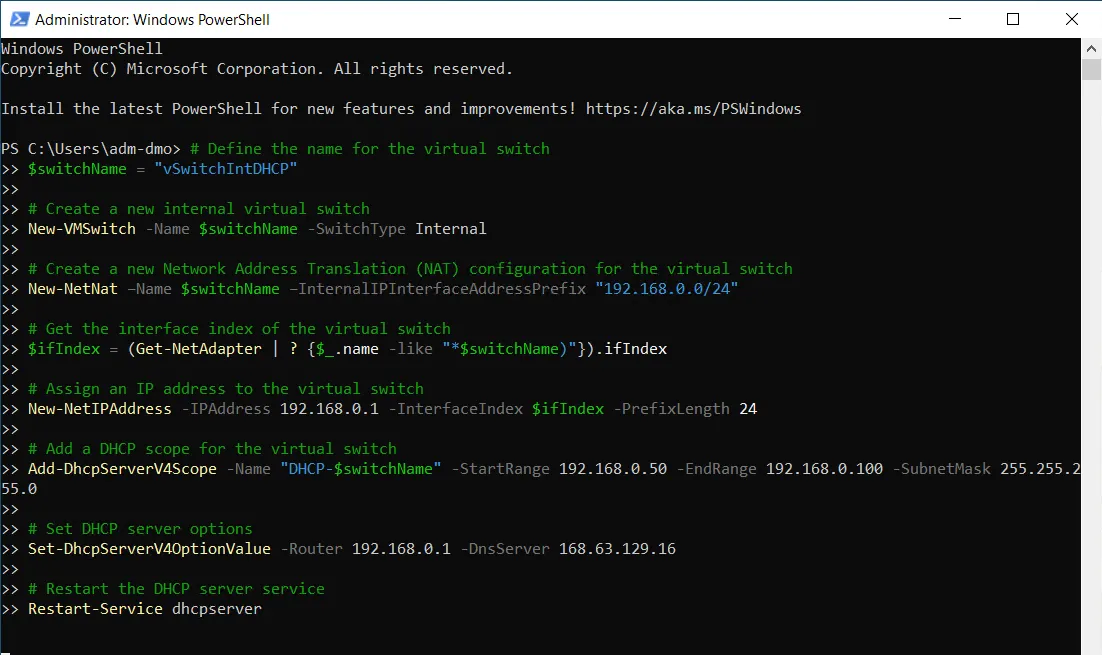
- After the reboot, open PowerShell as administrator again and run the second script.
# Define the name for the virtual switch
$switchName = "vSwitchIntDHCP"

# Create a new internal virtual switch
New-VMSwitch -Name $switchName -SwitchType Internal

# Create a new Network Address Translation (NAT) configuration for the virtual switch
New-NetNat –Name $switchName –InternalIPInterfaceAddressPrefix "10.1.97.0/24"

# Get the interface index of the virtual switch
$ifIndex = (Get-NetAdapter | ? {$_.name -like "*$switchName)"}).ifIndex

# Assign an IP address to the virtual switch
New-NetIPAddress -IPAddress 10.1.97.1 -InterfaceIndex $ifIndex -PrefixLength 24

# Add a DHCP scope for the virtual switch
Add-DhcpServerV4Scope -Name "DHCP-$switchName" -StartRange 10.1.97.50 -EndRange 10.1.97.100 -SubnetMask 255.255.255.0

# Set DHCP server options
Set-DhcpServerV4OptionValue -Router 10.1.97.1 -DnsServer 168.63.129.16

# Restart the DHCP server service
Restart-Service dhcpserver
168.63.129.16 is the Azure DNS resolver, so your nested VMs resolve names the same way the host does.
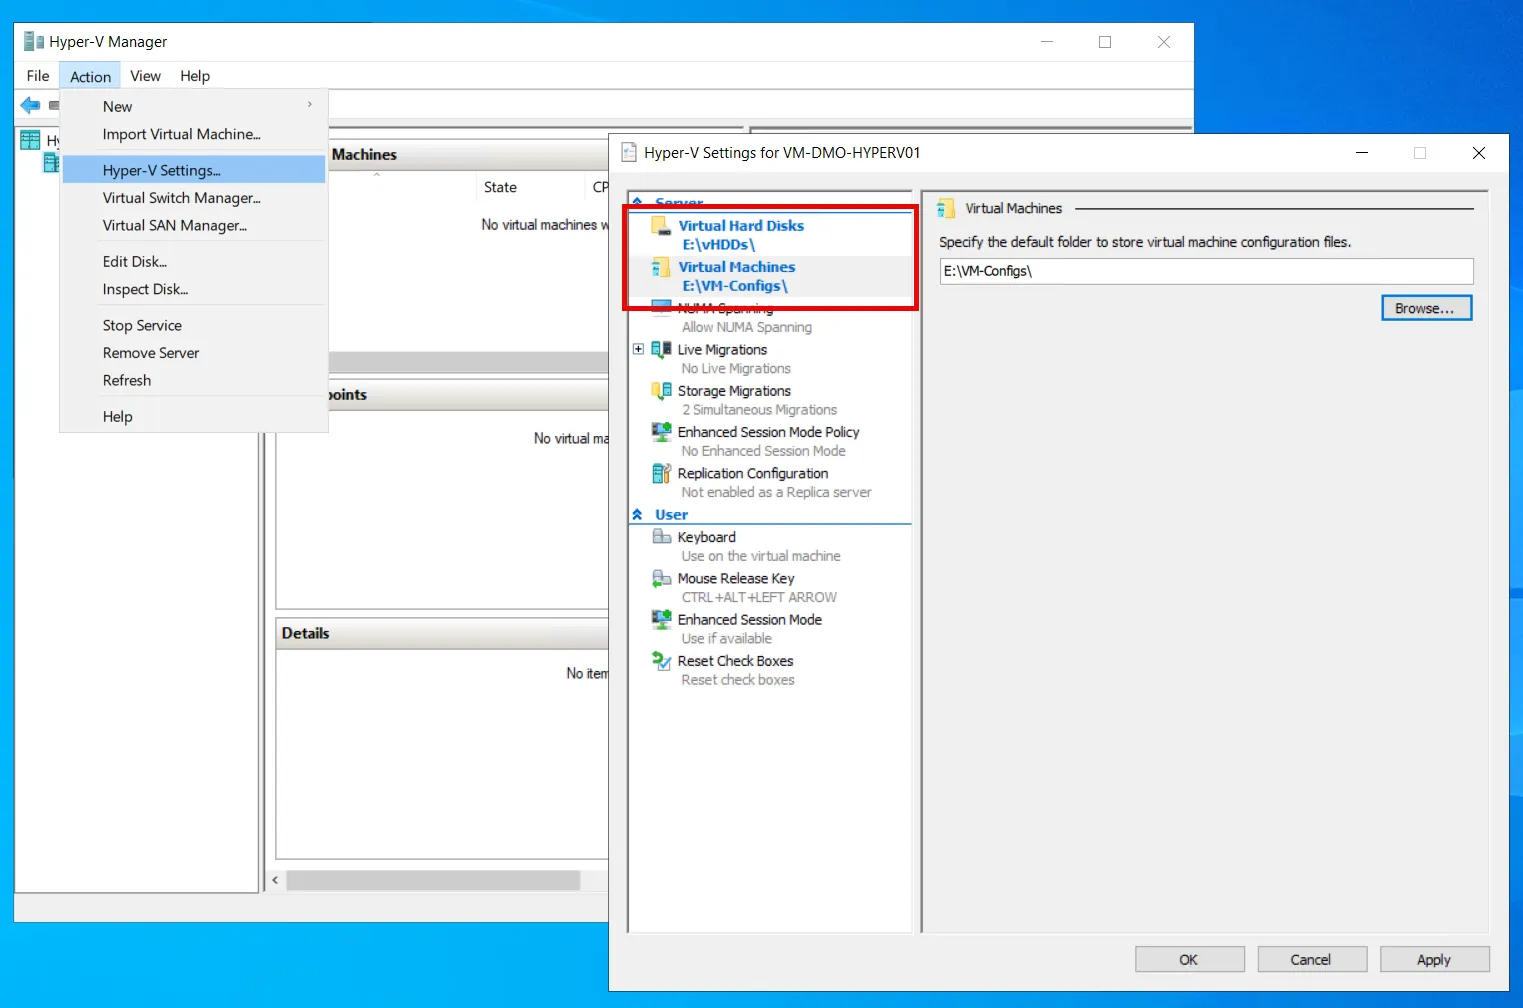
- That’s it, Hyper-V is now ready. One setting to change before you create VMs: by default, Hyper-V stores virtual hard disks and VM configuration on the C drive, and a few VMs will fill it. Initialize and format the data disk you added (Disk Management), then open Hyper-V Settings and point both Virtual Hard Disks and Virtual Machines to a folder on that drive.
Create Your First Windows 11 VM
Now we can create our first nested test VM.
Requirements
- Generation 2 VM
- Secure Boot enabled
- TPM enabled
- Recommended:
- 4 vCPU
- 12 GB RAM (Windows 11 runs poorly in a VM with less)
- 64 GB disk
Steps
- Download a Windows 11 ISO from Microsoft
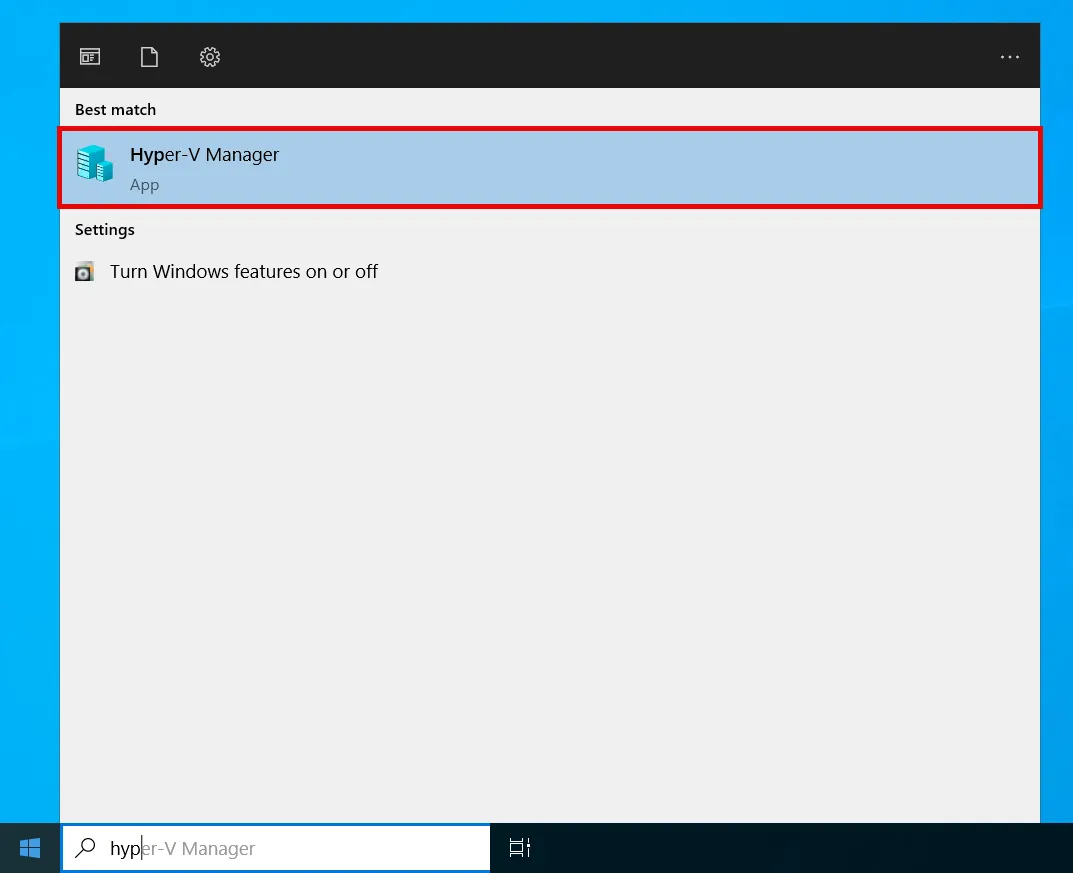
https://www.microsoft.com/software-download/windows11 - Open Hyper-V Manager
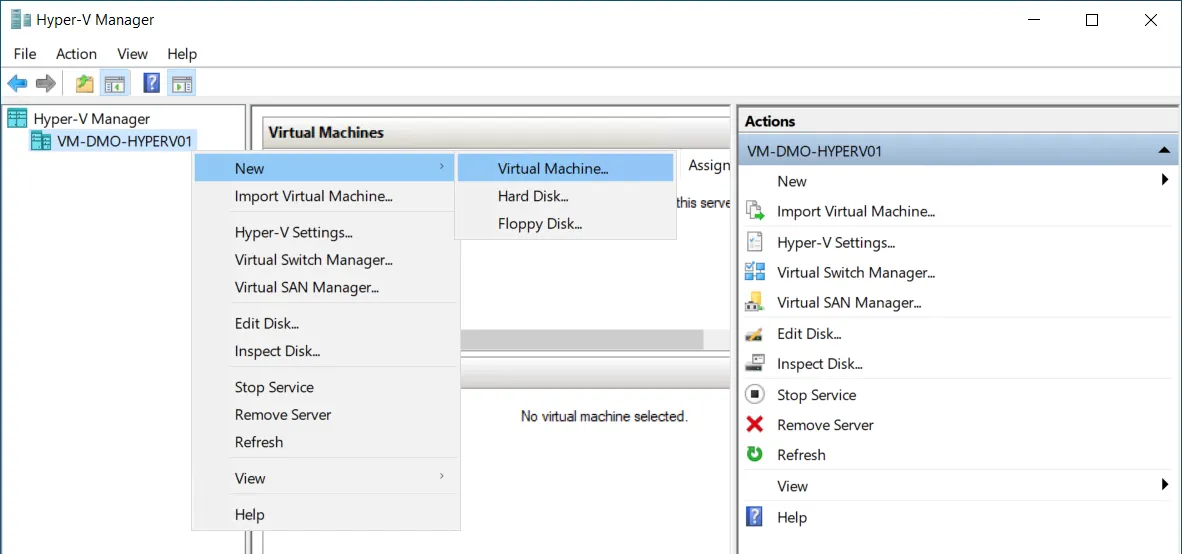
- Click New > Virtual Machine
- Select:
- Generation: Gen 2
- Memory: 12288 MB or more
- Network: vSwitchIntDHCP
- Attach the Windows 11 ISO
- Enable TPM in VM settings
- Start the VM and install Windows normally
After installation, the VM will automatically receive:
- An IP address via DHCP
- Internet access via NAT through the Azure host
Autopilot & Intune Readiness
At this point, your Windows 11 VM behaves like a physical device:
- It has full internet access
- It supports TPM and Secure Boot
- It can be onboarded into:
- Microsoft Entra ID
- Microsoft Intune
- Windows Autopilot
You can now:
- Capture the hardware hash
- Upload it to Intune
- Assign an Autopilot profile
- Reset the VM and test your full enrollment flow
Self-deploying mode does not work in this setup.
Conclusion
For me, this has become one of the most valuable tools for Intune engineering and validation. It is where I test policies, Autopilot profiles, customer scenarios and preview features without risking production.
Happy labbing.
Frequently asked questions
Which Azure VM sizes support nested virtualization for a Hyper-V lab?
Only certain VM families support it, for example the D, E, F, FX and M series. B-series VMs are not supported, and the security type must be Standard (not Trusted Launch). You have to choose a supported size during deployment, because nested virtualization cannot be enabled afterwards without redeploying the VM.
How much does a Hyper-V Intune lab on Azure cost?
Roughly CHF 0.20 - 0.50 per hour for a D4s v5 or D8s v5 depending on region, plus about CHF 5-15 per month for the OS disk and a minimal cost for the public IP. You only pay compute while the VM runs, so always deallocate it when you are not using it.
Can I test Windows Autopilot in this lab?
Yes. The nested Windows 11 VM supports TPM and Secure Boot, so you can capture the hardware hash, upload it to Intune, assign an Autopilot profile and reset the VM to repeat the enrollment. Autopilot self-deploying mode does not work in this setup.
Why does the lab use an internal switch with NAT and DHCP?
The internal virtual switch keeps your nested VMs on a private 10.1.97.0/24 network. NAT gives them internet access through the Azure host, and the DHCP scope hands out addresses automatically, so each VM works without any manual network configuration.